

Create Your Own Core Sample!
- 17th Jul 2026
- Author: Chloe Hopkinson & Emma Mosley
This summer at the National Space Centre, we are roaring and exploring with dinosaurs to learn about what wiped them out!
Around 66 million years ago, an asteroid hit the Earth, with the fallout leading to the dinosaurs' downfall. To find out more about this impact that left the Chicxulub Crater, scientists have collected a core sample.
A core sample is a long, tube-shaped cylinder of material that is drilled out from the ground. Core samples are used to help us understand the history of the Earth by investigating the materials uncovered!
Expedition 364
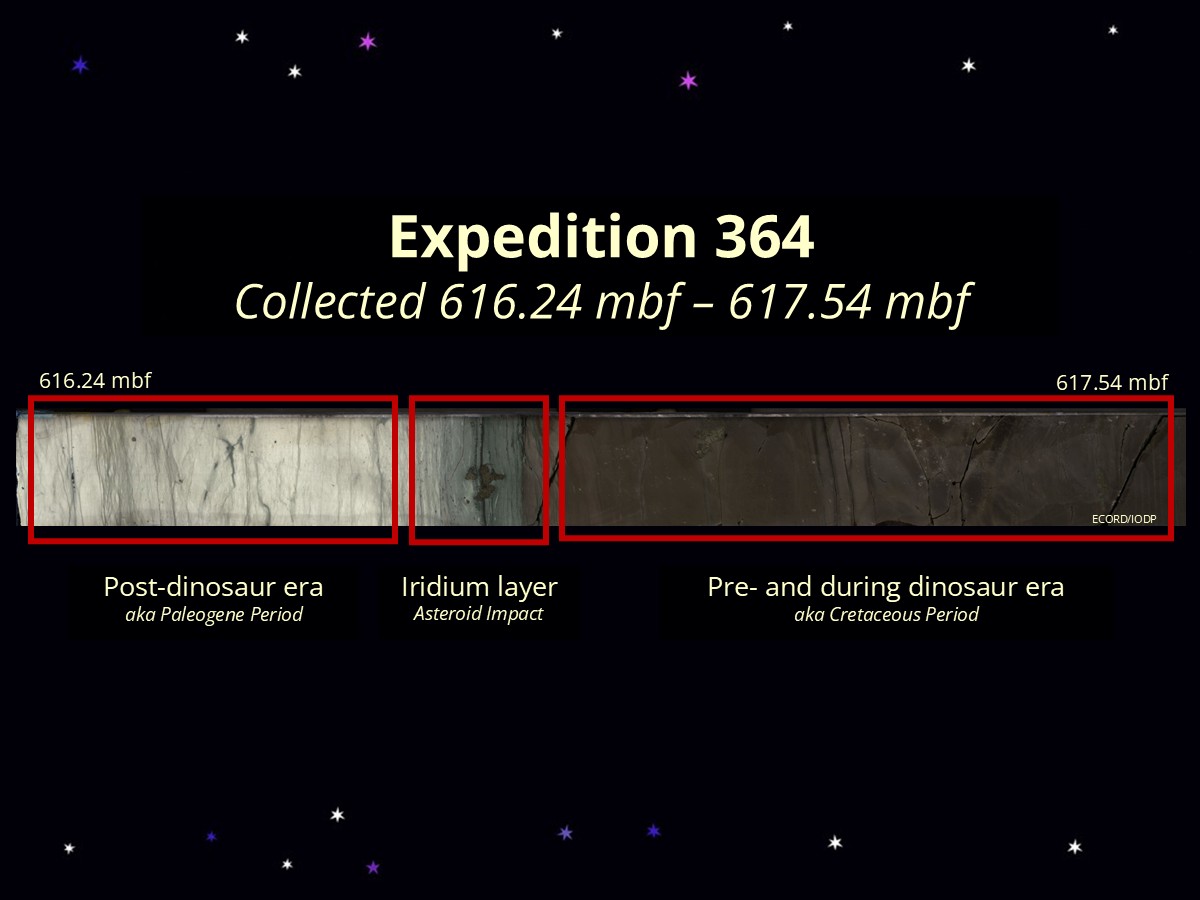
In April 2016, the International Ocean Discovery Program, with Expedition 364, drilled into the peak ring of the Chicxulub crater - the first ever mission to drill into the crater! The 60-day project drilled into the Earth's crust to collect 1,334.7m of rock material!
The materials they uncovered included granite, suevite, impact rock, and most importantly, iridium. Iridium is a rare metal that is found in space rocks like asteroids, but this metal is scarce in Earth's crust - this means any iridium we find most likely has come from space. The iridium found in the Chicxulub crater means that an asteroid did hit the Earth and contributed to the extinction of the dinosaurs, ending the Cretaceous Period and introduced the beginning of the Paleogene Period.
In the image, see if you can spot the greenish line of rock that indicates the iridium layer! This sample was collected from over 616 metres-below-seafloor (mbf). This is where the asteroid material ejected from the impact site and circled the Earth in the stratosphere, before depositing across the globe.
Let's make our own Chicxulub core sample!
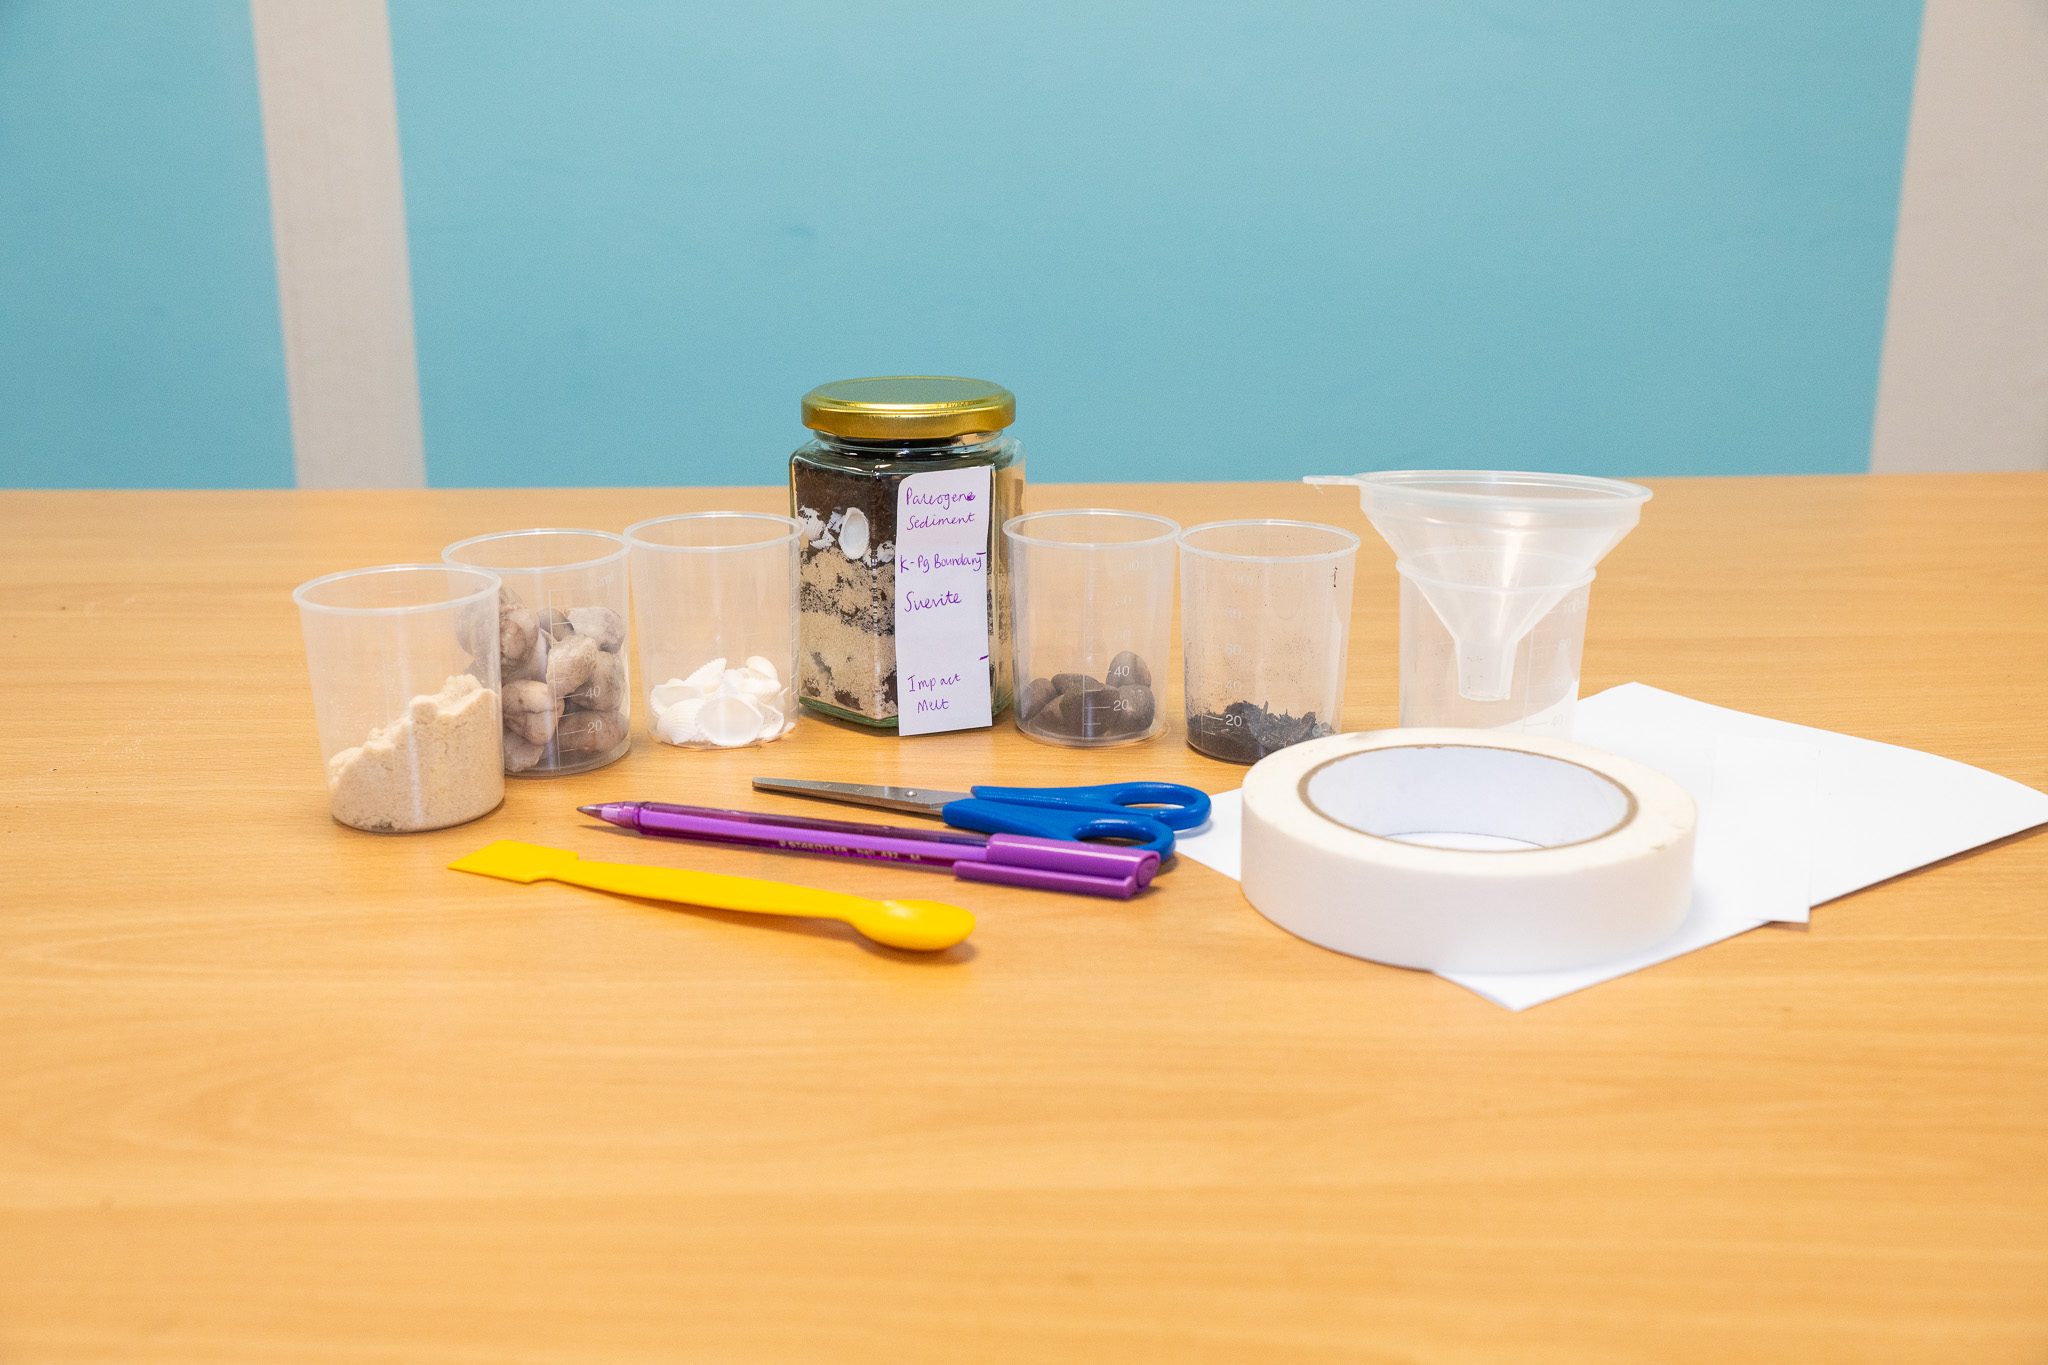
You will need:
- A clean jar with a lid
- Sand
- Gravel
- Soil
- Pretty rocks or shells
- Teaspoon
- Sticky label or strip of paper the length of the jar
- Tape
- Pen
- Funnel - you could use paper rolled into a cone with the point cut off
Make sure you have permission from an adult to use things found in the house and garden!
How to Make Your Own Chicxulub Core Sample
-
![CORE Label]()
National Space Centre Step 1
Take the lid off your jar and pop it to one side. Stick your long strip of paper to the side of your jar with tape.
Using your pen, draw two small lines splitting your label up into three equal sections. Make sure you leave enough room on the label to write what each layer is!
In the bottom section, closest to the bottom of the jar, label this third 'Impact Melt'.
In the middle section, label this 'Suevite'.
In the top section, closest to the top of the jar, label this 'Paleogene Sediments'.
At the line between the top and middle sections, write next to it 'K-Pg Boundary'.
-
![Core Step 2]()
National Space Centre Step 2
For the first layer, cover the bottom of your jar with gravel so you can't see through it. We recommend putting the gravel in by hand to avoid damaging your glass jar!
Then, pour in the sand to cover the gravel and fill it up to the top of the first section. Use your teaspoon to press down the sand to create a flat and even surface.
The sand and gravel layer represents the granite of Earth and the melted rock fusing together after the impact. This impact melt formed around five to ten minutes after impact!
-
![Core Suevite]()
National Space Centre Step 3
Mix some of your sand, soil and gravel together - remember to leave some soil for the rest of the core sample. Pour the mixture into your jar and fill it up to the next line.
This layer is called Suevite and is made of Breccia - this is broken up pieces of rock stuck together. It formed when the ocean rushed back into the crater, bringing in debris from the ocean and the impact. This debris took up to 24 hours to settle creating this layer!
-
![Core K-Pg]()
National Space Centre Step 4
Using the pretty stones or shells, cover the previous layer but try not to stack them on top of one another. This thin layer is a really special layer, called the K-Pg Boundary.
The element iridium is rare on Earth, and when we find a layer of it in rock, or in a core sample, something big like an asteroid must have brought the iridium to Earth. This is the evidence used to prove that the Chicxulub impact helped to wipe out the dinosaurs. It is called the K-Pg Boundary because it shows the end of the Cretaceous Period (K) and the start of the Paleogene Period (Pg).
It took around 20 years after the impact for this layer to form as the remnants from the impact slowly settled.
-
![Core Final Step]()
National Space Centre Step 5
Fill the rest of the jar with soil and use your teaspoon to press down the layer to help compact it.
Life started to return to the crater just a few years after the Chicxulub impact, with a full ecosystem by 30,000 years later. We can see the evidence of life returning as microfossils - these are really, really tiny fossils from microscopic sea creatures in the ocean. They slowly fell to the ocean floor, taking millions of years to form this layer!
We are using soil to represent life from the impact to today in the crater.
All you need to do now is screw on the lid of your jar nice and tight!


Final result!
Now your have made your core sample, perhaps you could think about where it has come from and what each layer represents!
Have a go at making more samples using different amounts of materials and see how they compare to each other. Or come up with your own crater and how it would look like if you took a core sample from it!
You can download this craft sheet to help you with the above!


Chicxulub Crater Core Sample
This is the full core sample collected from the Chicxulub crater on Expedition 364. You can see all of the different materials and sediments in each core, and exactly where the Chicxulub crater is!
Does your core sample look like any of the sections in the Chicxulub crater core sample?
For a tasty alternative, why not try and make an edible version of your core sample? You could use crushed biscuits, sprinkles, sweets, cereal, or chocolate chips!
Full Credits / References:
(Banner image) Core Sample with Dino, Credit: National Space Centre
(1) Expedition 364 Core Sample, Credit: ECORD/IODP
(2) Items Required, Credit: National Space Centre
(3-6) Step-by-step Instructions, Credit: National Space Centre
(9) Final Result, Credit: National Space Centre
(10) Full Core Sample, Credit: Gulick et al./IODP
(11) Drill Site Location, Credit: NASA (graphic created by National Space Centre)
